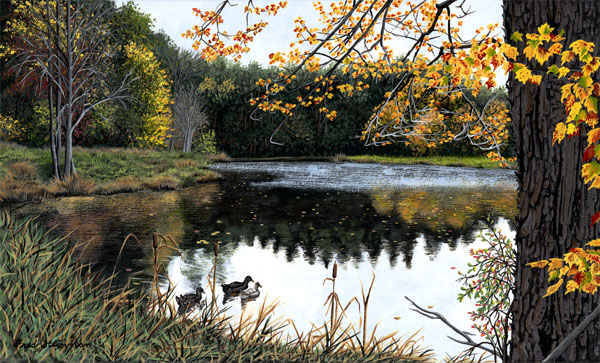
Fred Steinman

Feb 052010
 

In this blog entry I want to discus the first step in beginning the acrylic painting process. I will go into the details of exactly how I get the basic outline for the painting and lay in the color.

The first thing that I do is take the photo image that I have printed off. In this case it is the photo that is made up of six sheets of paper that I printed off with Adobe Photoshop and then cut the edges that overlap and taped them together with glossy scotch tape. The photo is the exact size of the painting that I will be painting.
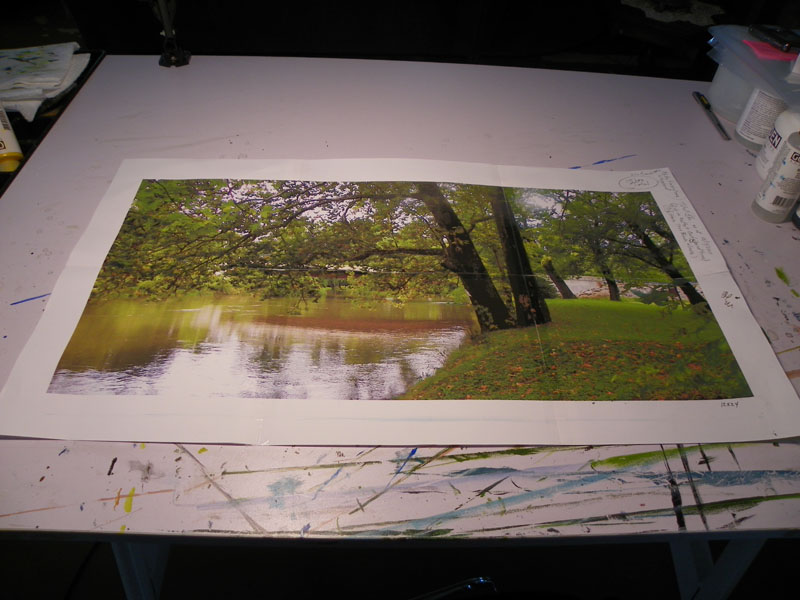
Thoughtful Spot larg photo print

I use the most inexpensive, photo quality paper, to print these images on. I tried to use just plane paper but, not having at least the quality of a cheep photo paper to look at, drove me crazy. I couldn’t even paint until I printed out another print. I also keep my notes on the side of the photo. I wright down how many hours each step takes for documentation. I then know how many hours each original takes. This is something that I have just started doing.

After the standard hardboard is prepared as in the post “What Surface Should Be Used For Detailed Acrylic”. I then lay graphite tracing paper on the board and lay on top of this the photo lining up the corners. After that I lay a piece of see-through tissue paper on top of this and trace the main lines of the painting.
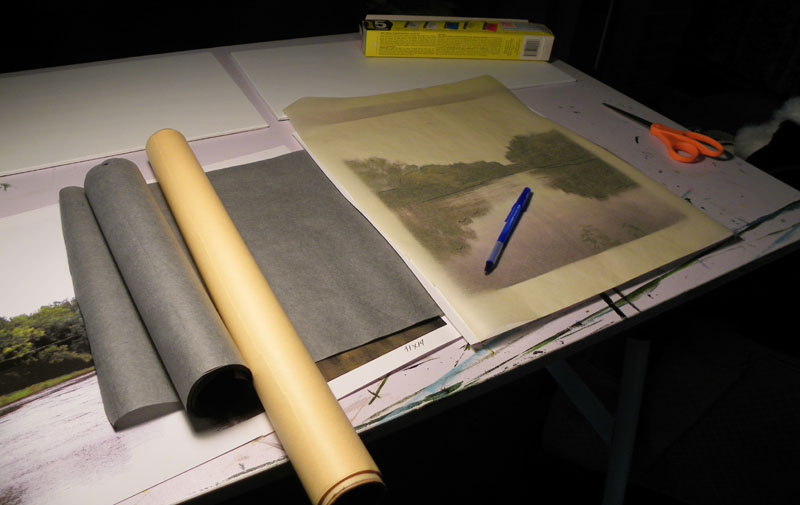
Thoughtful Spot grafite and supplies 800

I do not trace the whole image but only the main lines that will help me lay in the color. Some of these just get lost when the color is laid in but it gives you a starting point. This is just a short cut to getting the image transferred instead of having to do it by laying the grids in as in the past. I have drawn countless detailed drawings in the past and I just want to get the paint laid in quickly and not waste time in this process. I use a blue ballpoint pen and press hard in order to transfer the lines.
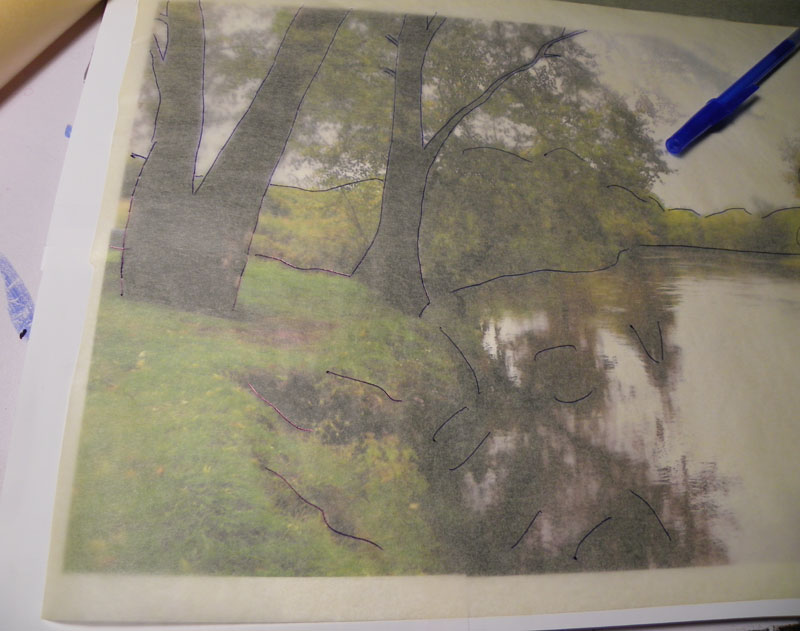
Thoughtful Spot tissue paper 800

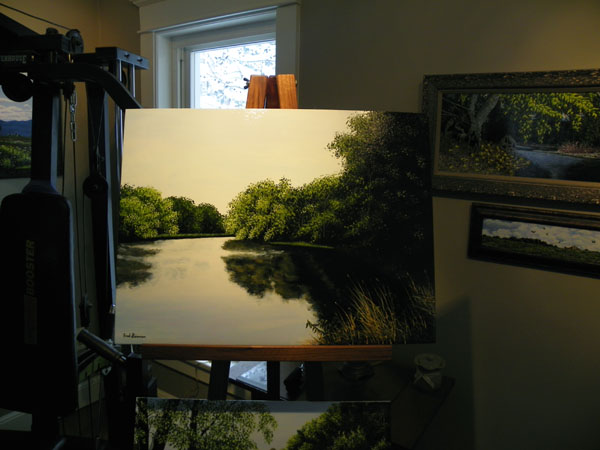
(Note:  I did not photograph this one step with “Thoughtful Spot”. These last two pictures are of two other paintings of French Creek.)

The blue is to help me see where all I have traced so that I can complete this process quickly. This process takes about five minutes to complete. You don’t have to take a lot of time because you will just have to draw it in with paint later anyway.
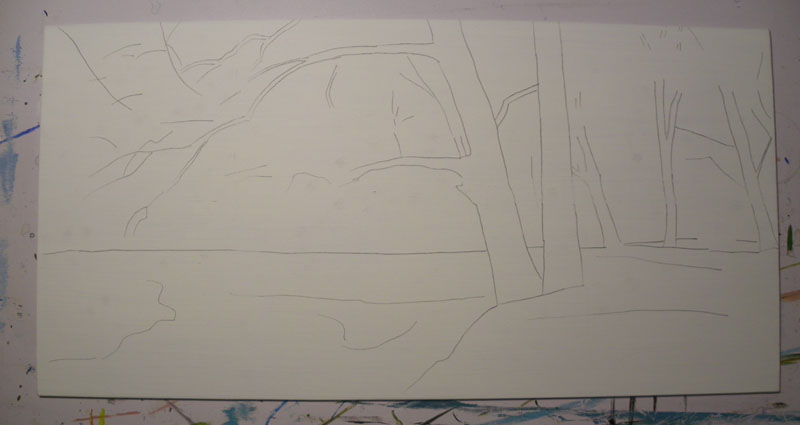
Thoughtful Spot drawn in 800

After this step is completed I then lay in the color. With this process, I lay the color in taking the time to get very close to the color that I want to end up with in the final painting. This will enable you to paint in the detail and not worry about covering all of the background surface,  the background color will already be there. This process will take about half and hour to forty five minutes depending on the differences in the subject matter. Some times the color has to be laid in several times to get it dark enough depending on the color and shade. Black for instance usually takes two or three coats.
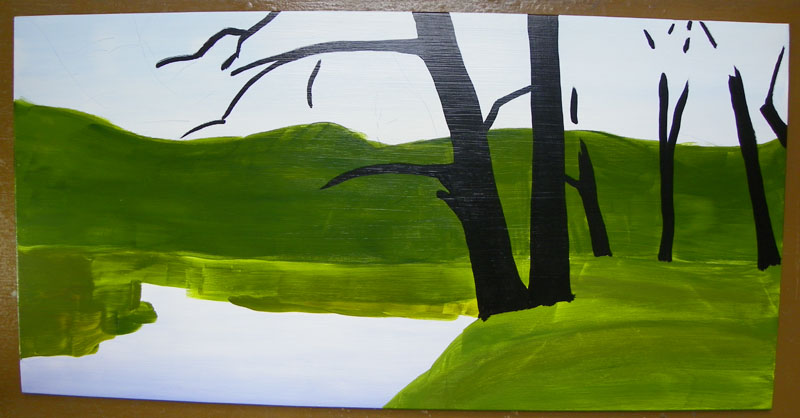
Thoughtful Spot color layed in 800

Note: I sometimes lay in the color for sever paintings at one time in order to have several paintings to the point of laying in the detail. It can speed up the process especially if the paintings are similar. Some days you may feel like laying in the prep work and not doing the detail. Other days you may feel like doing detail. It is nice to have paintings at different stages depending on your mood that day. For the most part I love the detail days the most but occasionally, I just want to do prep work. Your will have a lot more detail days than prep days.

I like to use the layer of see-through tissue paper over the photo and draw the blue ink lines on it instead of drawing them right on the photo so that I can still lay the photo on the table above the painting in progress in order to get the detail. At first I just drew on the photo but I learned by trial and error that I prefer to not have the lines on the photo.
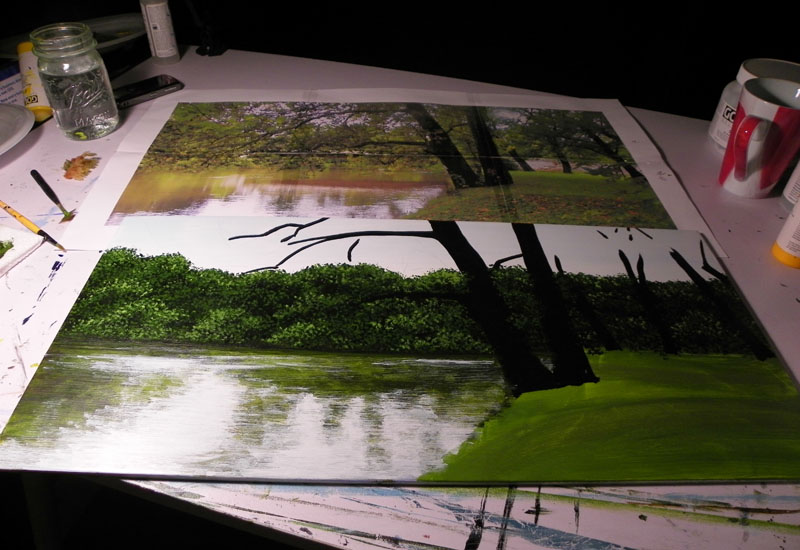
Thoughtful Spot double 800

When laying in the color you begin with the sky and water, then the tree line in the far background on the other side of the river, after that the trees and the main limbs and last the grass. Usually you lay in the color for the objects furthest away first and end with the objects closest to you.

As I mentioned in earlier blog post, I am a self taught artist and all of these steps are steps that I have developed over the last ten years that have made the process of painting a painting easier for me. I want to pass them on to you to make your process easier from the beginning. If any of these steps can make it easier for you it would make writing this post worth it.

Now you are ready to start the serious painting. I would subject that you go threw this process with your own photo and not try to copy mine. You would not be able to blow this one up for one thing and your will not be a pleased with it if it is not all your own. I painted two oil paintings from an art book thirty years ago. They showed you how to paint the painting step by step as an exercise in painting an oil painting. You were to end up with the experience of the project along with your own painting of the painting the author did. Although I learned a lot and my painting was not exactly like the artist’s in the book it did not mean as much to me as one that I have done myself. I did two of these exercises and ended up with two rather nice paintings but every time I think of them or see them the thing that comes into my mind is, “They are not originals of mine”. I would never want to show them to anyone because of this. I am only giving you these steps so that you can come up with your own masterpiece that will be all yours. It will just make the process easier.
Feb 032010
 

It is great to be able to blog again. I want to take one painting and go threw the whole process, step by step, in detail  to get across all that goes into a great painting. You can master the techniques in order to create photo realism but if the subject or composition are not strong all that effort will not be appreciated to its full potential. I feel that an acrylic painting needs to have a strong composition so that it can stand alone without a frame. With watercolor you can add several mats and a frame that fits that particular painting and it can pop . However, with acrylic and oil paintings all you have is the frame, which to me is a plus, but the composition has to be strong.

In this post I want to discuss in detail the composition of this one painting, “Thoughtful Spot”. I will begin with the original photo that I took and then cropped. A digital camera with 12 mega  pixels or higher is one of the best tools for a realism artist. You also need  a computer, a good photo program and a good printer.

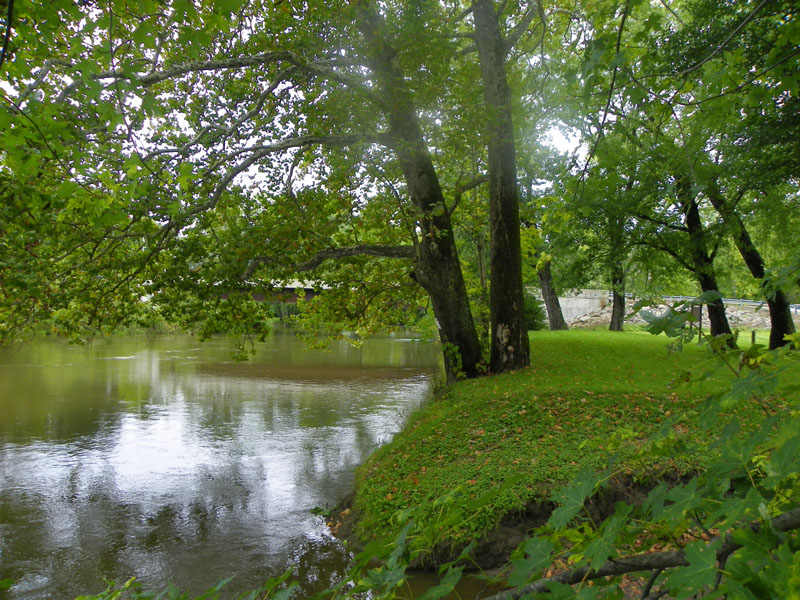
Here is the original photo I took with my Kodak EasyShare Z980 camera.

Original Photo Thoughtful Spot 800

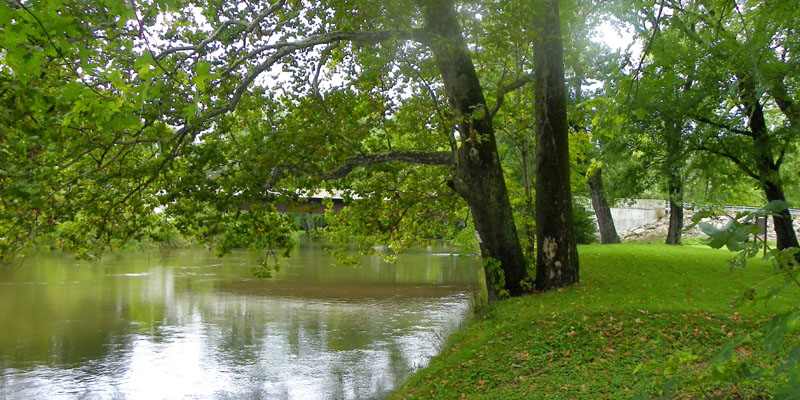
With the digital image and a good photo program you can then crop the picture into a strong composition to paint. It is rare for me to use the picture exactly as I have taken it. I like to crop the image into several possible compositions and sizes of  paintings and then choose the one that I think will make the best painting. I use Adobe Photoshop and have for years.  I like to crop it into the same size that I am going to paint and them print it off to use as a reference. This is helpful if you like to paint detail as I do. This next image is the one that I cropped for the painting “Thoughtful Spot” and it is the one that I printed off on my printer in an image that is 12″ x 24″. The Adobe Photoshop program will print it off for me in several sheets of paper that I then cut with a paper cutter and tape together. I like to use the shiny scotch tape because the image is clearer with this tape. I cropped four different possible paintings and chose the image below. Of course I only print out the one composition that I have chosen to paint.

french creek crop selected

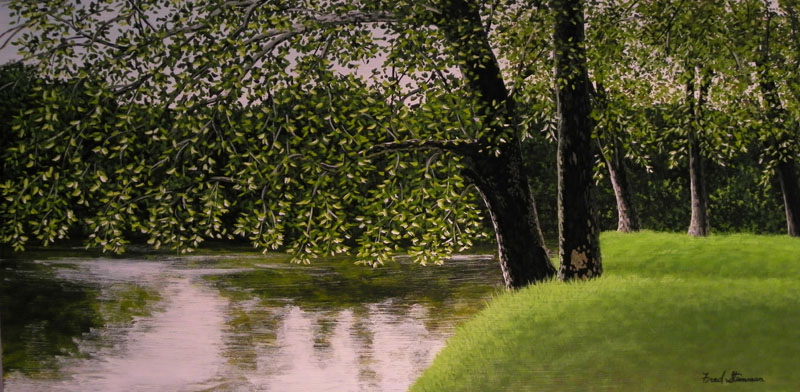
Here is the painting that I painted from this photo.

Thoughtful Spot 800

This painting is titled “Thoughtful Spot” and is 18″ x 30″ framed.

(Please keep in mind that the photo of this painting was taken in artificial light. Because of the glossy protective finishes that I put on the originals after they are done they do not photograph well. You usually see a glare on some part of the photo. The amber color  in this photo is not in the original. It is lighter and the white in the sky and water  is more like the original photo.)

Keep in mind that when you are using the photo program you can also adjust the photo and add  contrast, brighten it a bit as I did in this case or even adjust the color. I do all of that with different photos in order to get the feel that I want.

As you can see there are still some adjustments that you may want to make in the final painting. In this one I did not add the bridge in the background. It was early fall when I took the picture but wanted to paint a summer seine. I also added some sunshine on the tree trunks to help the trees stand out and add some warmth to the painting. You can also see that by having the picture the same size as the painting you can add the detail like the detail in the tree trunks and branches that help to make the painting.

In a later blog I will go into more detail about composition but I would like to make one more point here. You want to have at least one center of interest in your painting. This is a place in the painting that causes the viewer to pause and focus on different interesting places that their eye naturally wants to linger. This along with the ability to paint light will be what makes the viewer linger on your painting when it is hanging in an art gallery over other paintings that may be next to it. In this painting there are three or four centers of interest.  As you can see the main one is the two tree trunks on the river bank. The second one is the grass on the bank, after your eye first goes to the two main trees, it then goes to the grassy bank and your eye pauses there for a moment, after which it goes on to the next center of interest which is the water and its reflections. After pausing there a bit your eye goes back to the trees and then the bank and then the water again, only to then see the last center of interest which are the three trees on the bank in the background. After pausing there a bit it then goes on to what is not seen and you begin to daydream about what is just beyond the bend in the river and you have found that in this interaction with the centers of interest you have placed yourself into the painting.

This brings me to another point that I would like to make about composition. You want to keep the eye of the viewer on the image. You do not want their eye to be drawn off of the image, right onto a painting in an art gallery that is next to yours. Once  you catch their eye, you want to keep it on your work for a while. In the paragraph above, I mentioned the forth center of interest which was the three trees in the background that caught your eye and then you would start to daydream and wonder what was around the bent. If the tree to the fare right was angled to the right instead of the left it would at that point pull your eye off of the image. Instead as you begin to daydream and get to that point with your eye the tree angled to the left pulls your eye back into the painting.  Two more points, first the two main trees in the first center of interest, as your eye focuses on them with the way they are angled, the one to the right pulls your eye to the grassy bank and then the one to your left with its slant to the left along with the first tree branch pulls your eye to the water. Then the reflection in the water to the left with the point of the V in the reflection, pulls your eye right back into the painting onto another center of interest. If the two main trees were angled toward each other your eye would go two that point where they meat and stop without flowing onto another center of interest. Also if the V in the reflection was pointing the other direction it would pull your eye right off of the painting.

This is not something that the viewer is awaire of in most cases, but  is a very important aspect to consider when deciding on a strong composition.

If you look at the original photo that I used to crop for this painting you will see a tree to the fare right that is angled too sharply to the left. I cropped this tree out of the painting because it would have been a negative center of interest that would have been distraction to the composition and would have been in contrast to the relaxing and peaceful mood of the painting. When my eye went to these two trees they just stopped. I could not get them to move at that point. You don’t want the viewers eye movement to just stop or they will also move onto another painting that just might happen to be next to it in a gallery. You want the eve movement to continue so that they linger a wile with constant eve movement.

As you can see a lot of thought goes into the composition of a great painting. One more thing that I thought about was putting a fisherman in the painting. I have not put people into my paintings yet but have been thinking about doing so. After thinking about it for this painting I came to the conclusion that I wanted the viewer to see an inviting, sunny, grassy bank that would make them want to linger a wile. I have found myself feeling like I had to move on when I go fishing and find a beautiful spot to fish, if it is already occupied. I didn’t want the viewer to get this feeling when viewing the painting and not inter in.

This is a lot to take in, at least it was for me, but as your mind dwells on this topic you will be able to comprehend these concepts and it will become second nature to you in time.

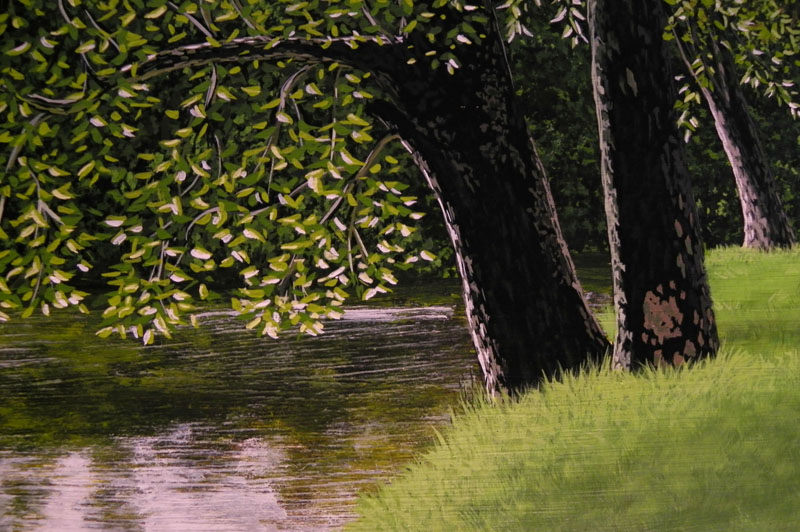
Cameo of Thoughtful Spot 800

One last thought about your eye being drawn into the painting. The detail that is put into the individual blades of grass draws your eye into the center of the painting. By not putting the same level of detail into the lower right hand corner of the painting, where there is also grass, helps to draw the viewers eye to where you want it to go. Different levels of detail also have an effect on the eye movement of the viewer.

Jan 062010
 

Edge of Creek

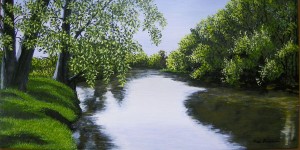
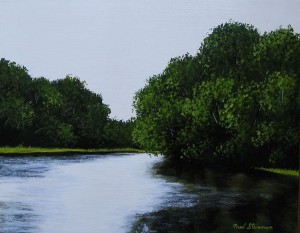
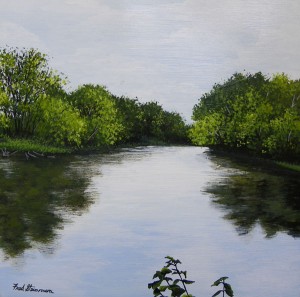
In this entry, I am posting the photos of four recently finished Original Works of Art  of one of my favorite subject matters, the Historic French Creek. All four of these paintings were completed between Thanksgiving and Christmas 2009.

Edge of Creek 600 #2

This is a  24″ x 30″ framed, Original Artwork painting and is titled “Edge of Creek”. It was finished around the 20th or December 2009. As you look at this particular painting on the wall it gives the viewer the illusion of looking out of a window and seeing a real scene, not even a photograph.  Of all of my paintings this one looks the most real.

Peaceful #2

This Original Artwork painting is titled “Peaceful” and was completed on or around the 17th of December 2009. It is 12″ x 22″ framed.

Tranquil 600

This Original Artwork painting is titled “Tranquil” and was completed on or around the 15th of December 2009. It is 20″ x 23″ framed.

Branches with Reflections 600

This Original Artwork painting is titled “Branches with Reflection” and was completed December 1st 2009. It is 18″x 18″ framed.

I love painting Original Acrylic Paintings of French Creek. It has so many different twist and turns and every one of them are just a pretty as the last one.

Jan 012010
 

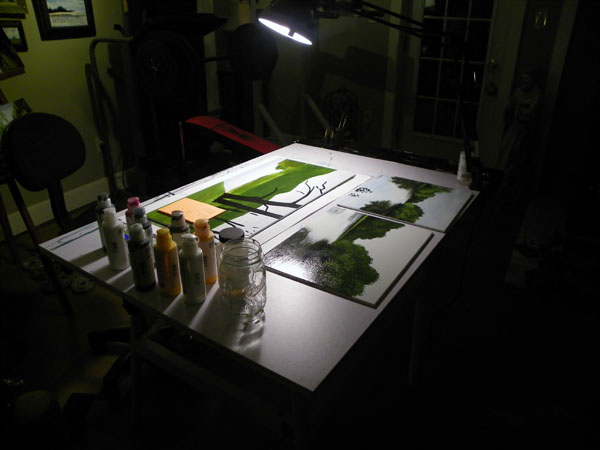
Flat Painting Surface

It has been hard to blog lately with the holidays and such but I wanted to get back at it. The above photograph is of my work surface. Is is a table that is 30″ deep by 42″ wide. The paintings are painted on standard hardboard as described below.

In this topic, I want to talk about the type of surface that I have used in the last few years for my detailed Acrylic paintings.

I find that the best surface to paint detailed Acrylic paintings on is standard hard board. The tempered hardboard has oil in it and is not acid-free. When I started painting after twenty five years off, I did my research and found out that standard hardboard is the surface of choice of many artist that paint detail in Acrylic.

I researched artist in “the Artist’s magazine” and found out that several of them paint on standard hardboard glued to cabinet grade plywood. Standard hardboard is fine by itself, if it is a smaller painting, but once you start painting larger paintings you needs the plywood to make it more firm.

I also went online to find out as much as possible about the artist that inspired me to paint again, when I had my “aha moment,” Fred Swan. After searching the web, the original paintings that I could find, that were for sale, were painted on hardboard.

That sealed it for me. That is all I have painted on since.

I have painted on canvas, in the past, but with my detailed style, I wanted to be able to lay the painting down flat on the painting table that I work on. I like to be able to rest my hand on the surface in order to get the extreme detail that I like to put in my work.

You can buy hardboard, pre-cut panels from any art supply shop or catalog but I like to make my own. I read an article in one of the issues of “the Artist’s magazine” and found an artist that cut his own hardboard out of standard hardboard that he got from a local building supply companies. He then glued it to cabinet grade plywood.

I prefer the quarter inch board over the eighth inch. It is much sturdier and can stand on its own without plywood if it is 18″ x 24″ or smaller.

After I cut the board on a large table-saw, I sand the edges and painting surface, remove all dust and put three coats of Acrylic Gesso. I sand each coat in-between and remove all dust. The board is then ready to paint on.

One thing I have also done is glue linen to the hardboard with Acrylic Soft Gel Medium and then put the three coats of Gesso on, sanding lightly in-between coats. This gives you a canvas look to the painting. The last few years I have preferred just to paint in the smooth surface of the prepared hardboard without the linen.

There are many other surfaces that you can paint on but this is my surface of choice. Good luck and happy painting!!!

Dec 132009
 

A Special Place_Canvas copy

The above painting is one of mine that many have said looks like a photograph. For some reason the images in the blog are not as sharp as they really are. They are a little blurred, not crisp. Although it is not my goal or desire to paint photographic realism, some of my work comes across as being photographic. I just like to do detailed work and the category my work is in, is Realism.

As I have stated in previous blogs, I love all types of art but everything that makes me, me is drawn to detail and realism.

I think a lot of it has to do with my personality and temperament. I have always been all about the small details in every area of life. For instance, even from an early age, as a child, I could identify every bird in my area in flight from a great distance. It puzzled me that other kids my age could not tell the difference from a starling and a common Grackle just by the combination of its silhouette and mannerism in flight.

I have always paid attention to the details of the wild plants that I saw in the woods near my house. I could spent hours just finding the woodland wild flowers and then looking them up in a book that identified them. I would then go to the encyclopedia and read everything I could on them. I had a special love for Jack in the Pulpits and Lady Slipper Orchids.

This love for details transferred into my love for art as well. I liked to capture the details of a Tufted Titmouse or a Jack in the Pulpit in some of my earliest drawings. As I mentioned in one of my earlier blogs, I spent hours and hours in first grade, doing a pencil drawing of a copy of the cover of a children’s book, with great detail.

Even though I have experimented with all types of art styles, the one thing that has always been a constant for me, is my continually coming back to realism.

I have to be honest with you. The main reason that I became disillusioned with art in the 70’s was that the art universities and the critics seemed to be down on Realism at the time. All of the awards were going to the new, more contemporary, styles. I could feel the pressure to conform to the style of art the instructors and the art community wanted me to do, and I was good at, but I was not happy. I got awards with it and never got a grade less that an A on any one assignment but, and that is a big but, it was not me!!! I tried. I could appreciate the new styles and the new direction, but it just wasn’t me. It just wasn’t the kind of art that made me feel good. It wasn’t the kind of art that I could just sit and look at for hours.

Needless to say, I was a square peg in a round hole.

This brings me to my philosophy on art. Do the kind of art that makes you happy and forget the art critics of the would!! Collect and hang on your wall the kind of art that you love. Who made them the gate keepers anyway! Anyone can criticize. The age old saying that applies to life also applies to art in my opinion. “If you can’t say something nice, don’t say anything at all.”

On twitter the other day I saw a post from one art lover to another that said something like this. “Realism, where is the talent in that. Any one can copy something.” My response to that is, there is a lot more that goes into a realism painting than just the ability to paint a picture that looks like a photograph. What makes a great painting is a combination of many things like subject matter and composition.  Is the composition strong, can it stand alone? Does the artist use light and shadow? Can you actually feel the Sun shine? Other elements that are important are the use of color, the use of texture. Are there multiple focal points? Is your eye drawn into the painting and not off of the page? The list can go on and on!!!! A book could be written just about these topics. These are all topics for future blogs.

As you can see  there is a lot that goes into a great realism painting not just the ability to copy something or for that matter an abstract or impressionistic painting.

In answer to that critic, I would say, “let’s support one another and not criticize other artist that are not just like us.” I have never criticized another artist or their work. I think that we are all unique and have different talents and abilities and that we need to be ourselves and not care if someone criticizes us, for being us.

When you are true to yourself and are truly content with your work, who cares what an art critic says!!!!

One thought, how can you be happy when you are criticizing someone else or their work? I don’t know about you, but I can’t!

Dec 092009
 

July in Bermuda copy

In this post, I want to let you know why I prefer Acrylic over any other medium.

I love all mediums of art!! I have had experience with all the mediums, after taking five years of art in high school and three years in college. I loved doing pencil drawings with lots of shading, but I also experimented with line drawings with different thickness of lines. I experimented with drawing an image while keeping your eyes on the image and not on the page. After experimenting with a whole host of different styles of pencil drawings,  I always came back to the detailed drawings as my preference, because that is who I am.

I did color pencil drawing and charcoal as well, but the led pencil was my preferred drawing medium of choice.

I loved water color and did many of them, but I found myself going back to the detail that I could only get with acrylic. So why do water color if you are trying to get the same effect as Acrylic?

What I am trying to say, is that I did it all from ceramic poetry, done on the wheel, to paper collage; from the abstract to free flowing form and color. I have many works that I have kept in many different mediums, but when it is all said and done, I still prefer Acrylic for my own work.

I know that some artist can get tremendous detail with Oil but for me, I grew up in the 1970’s and Acrylic was just getting popular. I fell in love with it then and tried oil, but always came back to Acrylic.

When I had my “aha moment,” after looking up on the wall and seeing a print by the artist Fred Swan, I knew that Acrylic would be my medium of choice. Then to top it all off, after doing some research on Acrylic, I found out, that sometime, in the twenty five years that I had not been painting, Golden Acrylics had come out with a Fluid Acrylic. A Fluid Acrylic has all of the pigment of a Heavy Bodied Acrylic but has the consistency  of soft cream. I used to have to thin down the Heavy Bodied Acrylic so much in order to get the detail that it lost some of it’s bonding properties. I was ecstatic to say the least when I found out about this creamy Acrylic!!!

Because of my personality traits of painting detail, and also having a desire to have my art last for generations after I am dead and gone, Acrylic is a good fit for me. With these Fluid Acrylics I can get the detail without compromising the bonding ability.

Acrylic is so permanent that on my last painting, while I was signing my name, I tried to wipe my signature off just thirty seconds after I began to paint it. There was no way. I had to paint over the signature and start all over again.

One reason I like Acrylic over Oil is that you can paint detail so quickly without waiting days for the Oil to dry. You can even take a hair dryer to it to speed up the drying process.

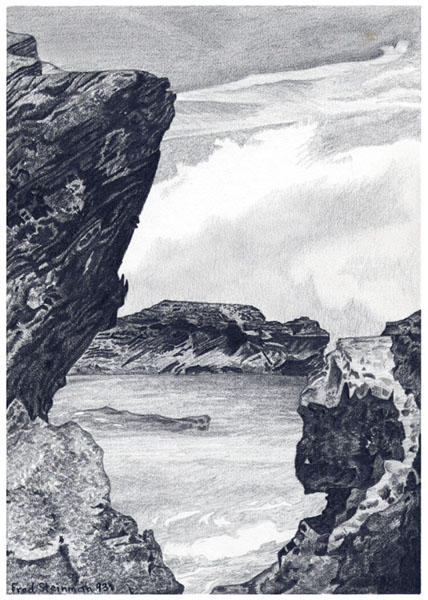
Unlike Water Color, Acrylic does not begin to fade after thirty five years. Nor can it be damaged by mold or water, like a Pencil drawing (note: Refer to the pencil drawing at the top of this post. It is the drawing I did after my wife and I went to Bermuda that I mentioned in another blog. It  developed mold after it was framed and you can see the mold in the top right hand corner.) or Water Color. It has elastic properties and does not crack like Oil.

After I finish an Acrylic painting, I like to give it two isolation coats of Golden Acrylic’s Soft Gel (Gloss) mixed with water. This gives it a permanent layer of protection. After this I finish the painting with two top coats of Golden Acrylic’s Polymer Varnish with UVLS (Gloss). This puts a protective coat on the painting that can be removed with ammonia and water. If the painting were to get soiled in the future the Polymer Varnish can be removed and them replied.

I had one painting, while at the frame shop being framed, get a deep scratch on the surface. I took it home and removed the Polymer Varnish with ammonia, a cotton ball and some water. The scratch was only in the Polymer Varnish finish. After the painting dried, I then reapplied the two top coats of protection and the painting was in perfect condition.

That is permanency to me. This process can help a painting last for generations.

One of my larger paintings, that I did on  hard board glued to three quarter inch cabinet grade plywood, that took over three hundred and fifty hours to complete, I also coated the sides and the back with two coats of the clear soft gel to act as a humidity barrier.

As you can see, I am all about permanency and all about detail. That is who I am!!!! That is what makes me happy and is why Acrylic is the medium of choice for me.

I want to say again, you need to be you and I need to be me! You may prefer to work with paper and Water Color, that may be who you are. I am not out to change who you are, I am just telling you why Acrylic is right for me.

Again I want to point out that, I love art in every medium! Ceramic is even more permanent than Acrylic unless is to broken but that is not my medium of choice, even though I had three years of it in college. All that makes me, me is what influenced my medium of choice, just like all that makes you you will influence you with your medium of choice.

Dec 052009
 

Winter in Black AshI am writing this entry to encourage you to find that “aha moment” that will let you know that you too, are an artist. That moment that the light comes on and you know, that you know, you can do it. That moment that you just know what direction you are to go in art, both in style and medium.
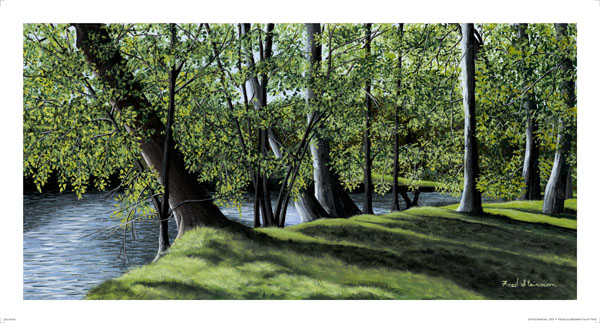
It was this kind of moment that caused me to get back into painting, even after being out of it for twenty five years.

In an earlier blog, I mentioned my “aha moment”. I want to expound on it here, and let you know what series of events led up to my “aha moment,” so that you can begin the process of finding yours,  if you haven’t already. It is the moment that belief and direction are realized.

Well, for years, I had been wanting to get back into art. I had been wanting to build an art business that would fill in the slow times in the winter months when my construction business was slow and keep the income steady. My desire was to do both businesses until the art business would then take over and I would do construction only for my favorite clients. I had been dabbling in detailed pencil drawings, but that was just for relaxation and did not involve the real desire that I had down deep. The desire to create works of art that would live on well past my years on this earth.

You see, part of my personality is to create work that would last a long time, weather it was painting the walls of a house in my construction trade or planting trees in my yard. I wanted to do the best job, with the best prep work possible and use the best paints, so that the painting job that I did for a client would last as long as possible. I wanted to plant the right tree so that the next generation would be able to picnic under it and enjoy the shade that it would bring. I did not care if the next generation knew who planted the tree, or who painted the room, but that the work would last.

Because of that personality trait, I did not value the pencil drawings as much as I would an acrylic painting, even though I spent countless hours on them, because they did not have the permanence of acrylic. With us living in the Northwestern corner of Pennsylvania we have very little need for air conditioning, combine that with the moisture from the Great Lakes and  you have a perfect set of conditions for mold. Case in point- one of my favorite drawings of a trip that my wife and I took, after having the drawing professionally framed, developed mold. That to me is not permanent.

With thoughts of creating a more permanent form of art, along with the time of year, Christmas – which is the time of year that I always did my relaxing pencil drawings in the past years,  and the fact that starting to get back into art was on my mind I looked up on the wall of a local art gallery and frame shop and saw a Fred Swan print of a detailed painting. It was the type of detail that I did in high school and thereafter, that I was most comfortable with. I had my “aha moment”, the moment that I said to myself, “I can do that”. I purchased a book from a bookstore for a quick refresher course and jumped right back in.

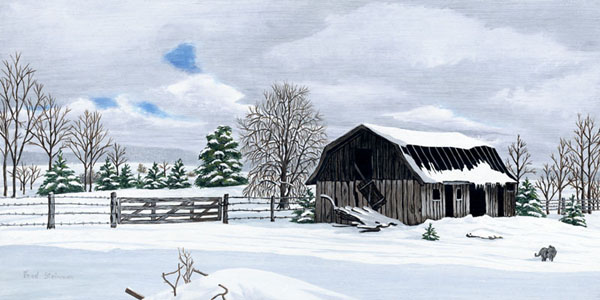
That first painting I did, after being out of it for twenty five years, I have sold prints off of. The original is too priceless to me to sell, just because of the sentimental value. The painting of our barn in the winter at the top of this blog is the first painting I did after my “aha moment”.

This painting was inspired by a fleeting moment here in Northwestern, Pennsylvania when the Sun came out just for a few minutes. We, in this part of the country, because of the Great Lakes, can have three weeks without the Sun even coming out for a few moments. It’s times like these, that the Sun comes out only for a moment, that it brightens your day and you just want to smile. That moment is captured in this painting for me.

Your “aha moment” may come after you have had the time to try a few different mediums and styles. Depending on how much experience you have had in art before can have an effect on when your “aha moment” will come, but if you are willing to explore your thoughts about what art is to you and what effect it has had on your life, your moment will come. Think about what type of art makes you happy. At some point the light will come on, the thought will enter your mind and you will say like I did, “this is it, I can do this, this is the direction I will go in for the rest of my art career” and your “aha moment”,  like mine, will change your life.

Nov 302009
 

This entry is to motivate you to always be true to yourself. Weather you are an artist or a singer don’t try to be someone else. Be You!!!

We have all seen vocalist that try to be someone else and are not original. Why would anyone want to buy their CD’s if they could buy the real thing instead? That is the same way it is with the visual arts.

Yes, just like a vocalist may be influenced by a particular artist or a particular style of music the visual artist also, can be influenced by a particular artist or style as well; both of them need to find themselves. They need to be the unique artist that they were made to be.

It may be fun to imitate someone for a time but real satisfaction can only come from being yourself and painting the type of art that is natural for you. If you have a personality that is not much for details in other areas of life you would not be happy painting detailed paintings in art as well. If you are more of a free spirit then that would show up in your art.

One example of this is, myself as an artist. When I was in the first grade I spent my whole lunch break for days drawing a copy of a picture on a children’s book cover that I liked. It was a pencil drawing with shading and everything. It was the first time that I spent hours and hours on one drawing. I felt that it was my masterpiece. When I was finished with it, I took it up to my teacher to show it to her. Her response to me, and I quote, was “why don’t you color it with crayons now.” I was so devastated that I never showed a teacher a drawing that I did in my spare time again.

From an early age I was fascinated with detail. That is who I am!

Through the years I have done every kind of art possible. I participated in art in elementary school and took art in the 9th though 12th grade. I took four years in ceramics in college as well. I, as all art students, have done everything from detailed to abstract, from sharp lines to free flowing color, from portraits to landscapes. This is all important for you as an artist to experience all of these in order to find out who you are as an artist and to find your unique style.

After all of these art classes I came right back to my roots. Right back to the detailed style that I had in the first grade. Why? Because, that is who I am.

I tried to be a different kind of artist. Let’s get real. This was the 1970’s and nobody liked realism unless it was of subjects like seeing yourself in a silver ball but certainly not landscapes. That was the old art not the new hip art of the 70’s.

For this reason I got away from the realism that makes me happy to the free flowing art that the era and the art schools dictated. This was one of the reasons that after many years wanting to go to college and major in art and not receiving any grade for art less than an A, I decided to take several years of ceramics in college just as a release and major in something else. You see art no longer made me happy because I was not doing the art that I was born to do. Because I was creating art that did not make me happy I soon lost interest in art all together.

After college I painted two paintings for our parents for Christmas one year in detail and did not paint again for twenty five years. I did however draw at Christmas time each year when work got slow because I could pick it up easily and put it back down again. I did detailed drawings.

Then one Christmas I was walking through a local gallery, I look up and on the wall in front of me was one of Fred Swan’s prints. It was detailed and that was my “aha moment”. I said to myself, “I can do that.” I purchased the print along with another of his and started painting again.

This time I was going to paint the kind of paintings that make me happy. The kind of paintings that I wanted to hang on my own walls. Not the kind of paintings that some art critic said was right or wrong. I was going to forget the art critics and just enjoy being myself, and paint.

Since I made this decision, I have been told by art critics that they love my work and that it is strong enough to stand alone. It doesn’t need to be framed. And they have given me awards and I have gotten  into many juried competitions in my try state area.

The point is, just be you. Experiment with different mediums and styles in order to find out who you are, but when the day is over, so to speak, just be you. Go back to what makes you happy and unique!!! We are all individuals and all have our own stile. Just find yours and be you!!!!!!

Nov 272009
 

Let's Picnic

Welcome to my world!

I am a realism artist that believes that we all have an inner need and desire to be creative and create. We all have unique gifts or talents and abilities that no one else in this world can duplicate. I believe that we are not totally happy in life and fulfilled if we are not taking  some time, to do the small things that give us fulfillment. I believe that we are born with these gifts or talents and we can improve on them with practice and development, but they are already there.

I know, from my own experience, that life has a way of crowding out these desires and needs as we get married, have kids, and get involved in those jobs that provide for ourselves and our families. This natural process has a way of taking control of our lives and crowding out the time we have to  be creative and experience the fulfillment that being creative brings. This blog hopes to change that.

My area of creativity involves the visual arts,  acrylic painting and photography along with gardening and the hybridizing of daylilies. We can have more than one interest creatively and different talents. That is what makes us unique. To some their area of creativity is music, to another it is gardening, to another developing recipes, to another creative writing and the list goes on and on.

I also believe that this creative process has healing qualities. That it feeds our inner being and is healing to the the body as well. To some, music can make them weep and gives them great pleasure and is healing to their soul. To me, I like music but the visual arts are much more healing. I can sit and look at a painting  for hours and it feeds my inner being! What would life be like if we did not have the arts?

If we did not have the culinary arts what would make a good restaurant? If we did not have music and the human voice what would be appealing to the ears other than the sounds of nature which are God’s creativity? If we did not have the art of architecture what would our buildings be like?

As you can see the arts bring more than just meaning to life that plain words can not express!!! It would take someone gifted in the art of words to express all that the arts bring to our lives! Creativity in our society is all intertwined and all of our gifts come together to create beauty.

This blog is about the visual arts. If you have ever participated in art in your life time and known that you were an artist, and gotten away form it through the years for various reasons, one of the purpose of this blog is to encourage you to get back at it.

Another purpose of this blog is to encourage you to be you! Do the art that makes you happy and that you are gifted in. I am a realist artist that likes to paint color, light and shadow. You may be an abstract painter that likes to paint shapes or portraits. I like to paint landscapes and buildings. The point is, be you and paint what makes you happy.

Another purpose of this blog is to share the techniques for my realism style for all those that are interested in this style of art. Of course, as you learn and practice the techniques that I give you your art will develop into your own style of painting just as mine has. I want to give my secrets and step by step instructions that I would have loved to be able to have learned from other artist when I was getting started. I am a self taught artist and the things that I have learned over the years that have made the creative process easier for me I would like to share with all those that are interested.