In this blog entry I want to discus the first step in beginning the acrylic painting process. I will go into the details of exactly how I get the basic outline for the painting and lay in the color.
The first thing that I do is take the photo image that I have printed off. In this case it is the photo that is made up of six sheets of paper that I printed off with Adobe Photoshop and then cut the edges that overlap and taped them together with glossy scotch tape. The photo is the exact size of the painting that I will be painting.
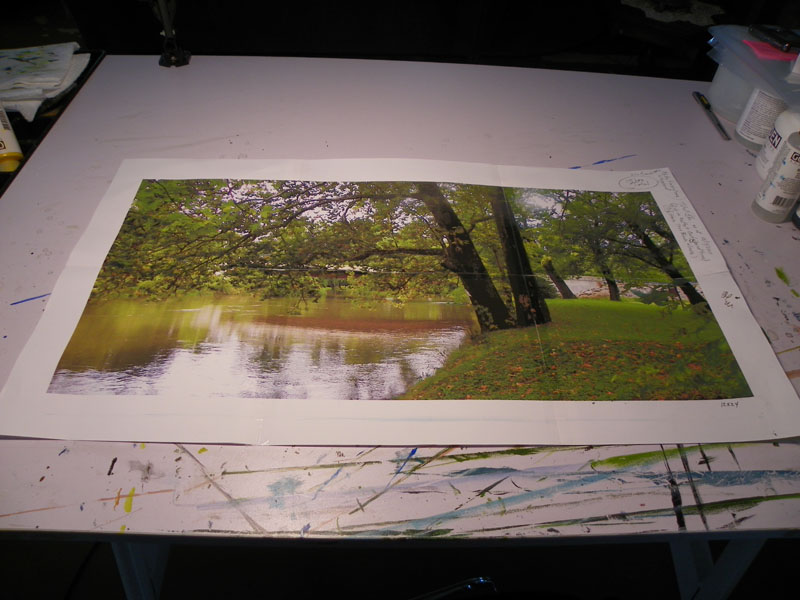
I use the most inexpensive, photo quality paper, to print these images on. I tried to use just plane paper but, not having at least the quality of a cheep photo paper to look at, drove me crazy. I couldn’t even paint until I printed out another print. I also keep my notes on the side of the photo. I wright down how many hours each step takes for documentation. I then know how many hours each original takes. This is something that I have just started doing.
After the standard hardboard is prepared as in the post “What Surface Should Be Used For Detailed Acrylic”. I then lay graphite tracing paper on the board and lay on top of this the photo lining up the corners. After that I lay a piece of see-through tissue paper on top of this and trace the main lines of the painting.
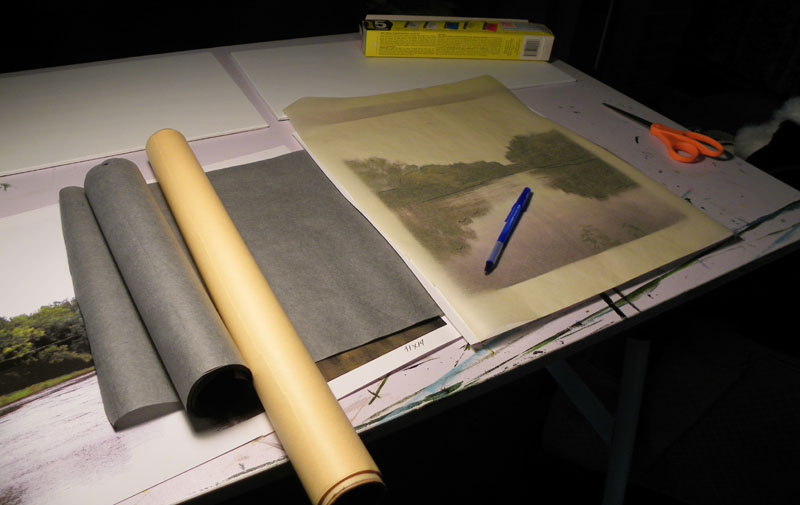
I do not trace the whole image but only the main lines that will help me lay in the color. Some of these just get lost when the color is laid in but it gives you a starting point. This is just a short cut to getting the image transferred instead of having to do it by laying the grids in as in the past. I have drawn countless detailed drawings in the past and I just want to get the paint laid in quickly and not waste time in this process. I use a blue ballpoint pen and press hard in order to transfer the lines.
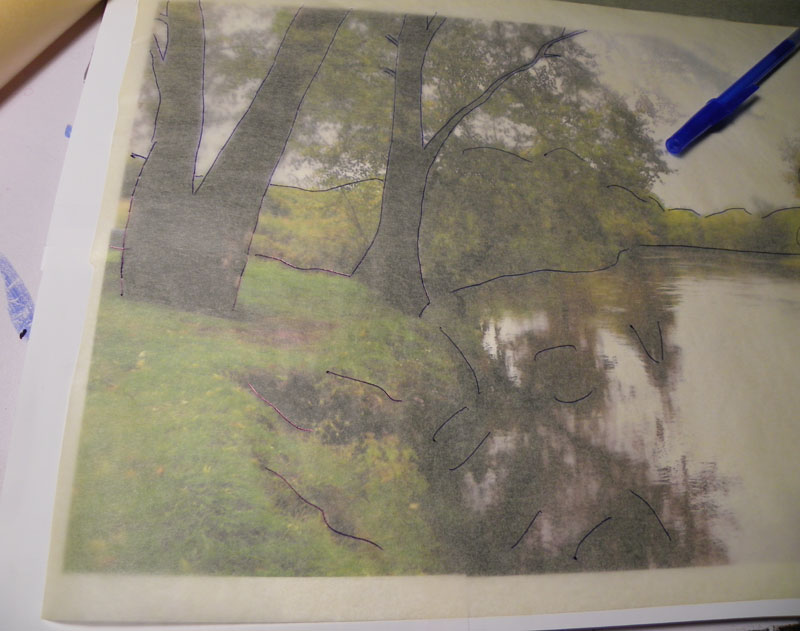
(Note: I did not photograph this one step with “Thoughtful Spot”. These last two pictures are of two other paintings of French Creek.)
The blue is to help me see where all I have traced so that I can complete this process quickly. This process takes about five minutes to complete. You don’t have to take a lot of time because you will just have to draw it in with paint later anyway.
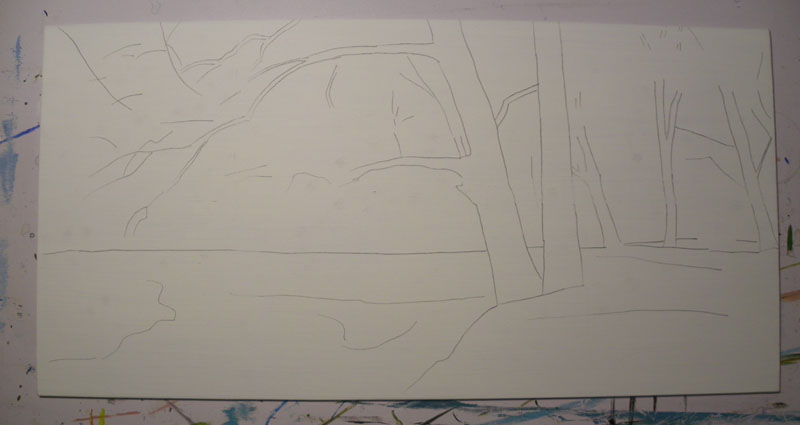
After this step is completed I then lay in the color. With this process, I lay the color in taking the time to get very close to the color that I want to end up with in the final painting. This will enable you to paint in the detail and not worry about covering all of the background surface, the background color will already be there. This process will take about half and hour to forty five minutes depending on the differences in the subject matter. Some times the color has to be laid in several times to get it dark enough depending on the color and shade. Black for instance usually takes two or three coats.
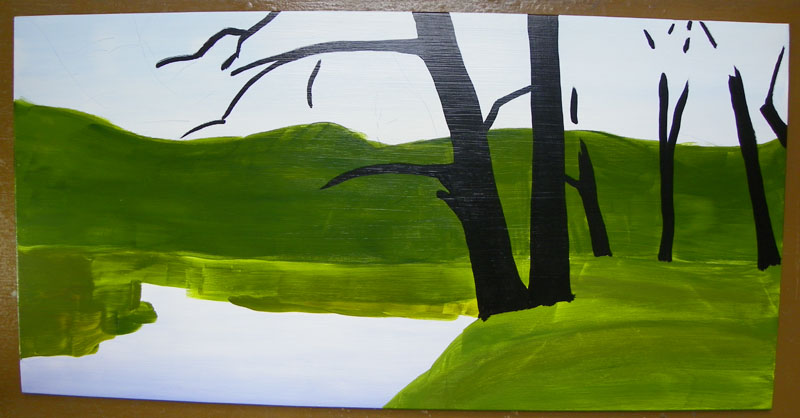
Note: I sometimes lay in the color for sever paintings at one time in order to have several paintings to the point of laying in the detail. It can speed up the process especially if the paintings are similar. Some days you may feel like laying in the prep work and not doing the detail. Other days you may feel like doing detail. It is nice to have paintings at different stages depending on your mood that day. For the most part I love the detail days the most but occasionally, I just want to do prep work. Your will have a lot more detail days than prep days.
I like to use the layer of see-through tissue paper over the photo and draw the blue ink lines on it instead of drawing them right on the photo so that I can still lay the photo on the table above the painting in progress in order to get the detail. At first I just drew on the photo but I learned by trial and error that I prefer to not have the lines on the photo.
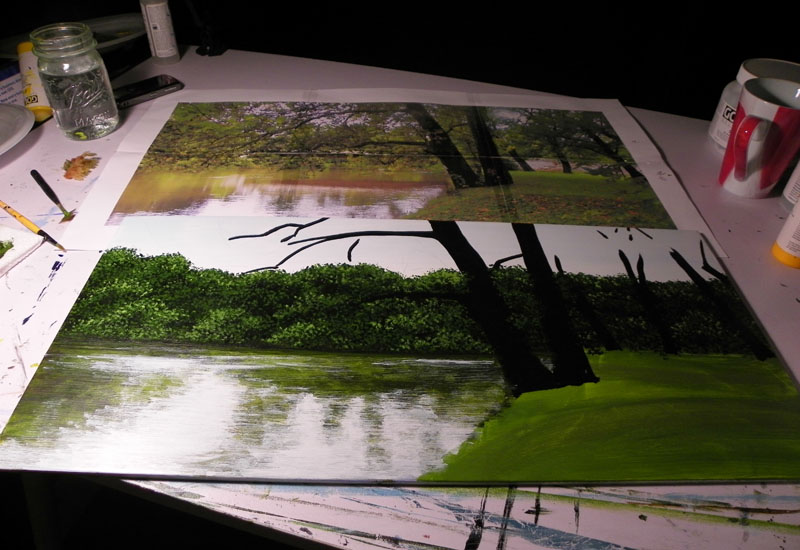
When laying in the color you begin with the sky and water, then the tree line in the far background on the other side of the river, after that the trees and the main limbs and last the grass. Usually you lay in the color for the objects furthest away first and end with the objects closest to you.
As I mentioned in earlier blog post, I am a self taught artist and all of these steps are steps that I have developed over the last ten years that have made the process of painting a painting easier for me. I want to pass them on to you to make your process easier from the beginning. If any of these steps can make it easier for you it would make writing this post worth it.
Now you are ready to start the serious painting. I would subject that you go threw this process with your own photo and not try to copy mine. You would not be able to blow this one up for one thing and your will not be a pleased with it if it is not all your own. I painted two oil paintings from an art book thirty years ago. They showed you how to paint the painting step by step as an exercise in painting an oil painting. You were to end up with the experience of the project along with your own painting of the painting the author did. Although I learned a lot and my painting was not exactly like the artist’s in the book it did not mean as much to me as one that I have done myself. I did two of these exercises and ended up with two rather nice paintings but every time I think of them or see them the thing that comes into my mind is, “They are not originals of mine”. I would never want to show them to anyone because of this. I am only giving you these steps so that you can come up with your own masterpiece that will be all yours. It will just make the process easier.
.…
thanks….
.…
ñïñ!!…
.…
ñýíêñ çà èíôó!…
.…
ñïñ….
.…
ñïàñèáî çà èíôó….
.…
ñýíêñ çà èíôó!…
.…
ñïñ çà èíôó!!…
.…
ñïñ çà èíôó….
.…
ñïàñèáî çà èíôó!…
.…
tnx….
.…
thanks for information!…
.…
good info!!…
.…
ñïàñèáî çà èíôó….
.…
tnx!…